Making your own pie crusts is not difficult at all. The use of a food processor makes it even easier and cuts down on the time significantly. First the ingredients; the following recipe will make two crusts for an eight or nine inch single crust pie, or the top and bottom crusts for a double crust pie.
- 600 ml (2.5 cups) all purpose white flour
- 1.25 ml (0.25 tsp) salt. If using salted butter, omit
- 15 ml (1 Tbsp) white sugar
- 250 ml (1 cup) very cold butter, cut into cubes
- Approximately 120 ml (8 Tbsp) very cold water

Getting Started |
We will be using the food processor to cut the butter into the flour. First, replace the dough blade you see in the photo with the regular metal cutting blade. I forgot to change it out before I took the photograph. We will be using very cold, very firm butter and we will need the metal cutting blade to cut the butter into the flour. Our fist step is to place all dry ingredients into the food hopper and blend them together. Next, slice the butter into small sections. I use frozen butter and allow it to soften just enough to slice. Once the butter is sliced, it will not take long for it to soften. Remember, we want to use very cold butter when making pie crusts.
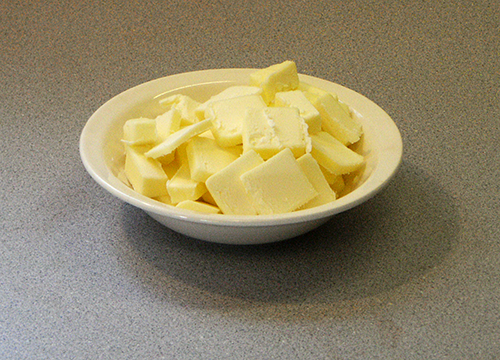
Cold Sliced Butter |
Set the food processor on slow and pulse. Feed the butter into the hopper pulsing each time for short periods. We don't want to overwork the flour and butter. Continuing adding the butter to the flour, pulsing each time, until all the butter has been added to the flour. At this stage, the flour will appear mealy.
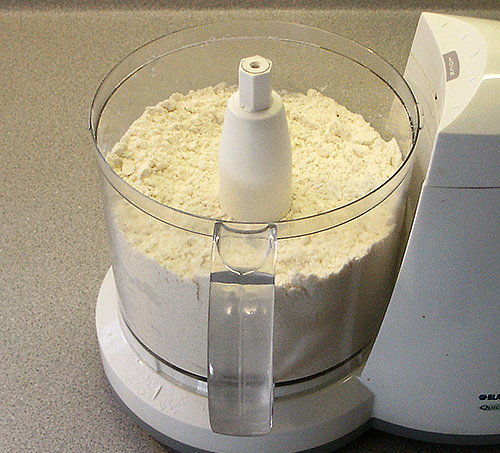
Flour And Butter Combined |
The next step in the process of making a pie crust is to slowly add the water a spoonful at a time. We want to add enough water to form the dough without it being too sticky. You may end up not adding all the water to reach the dough stage and that is fine; we don't really know the amount of water needed to form the dough until we actually start adding it. Add a spoonful of water to the butter-flour mixture and pulse the food processor. We don't want to over process the dough as it will cause our crust to be tough. Keep adding the water to the mixture until you see the dough come together. Stop at this point and test the dough to make sure it is not too sticky, or too crumbly. If the dough is too sticky, you can add a small amount of flour. If the dough is still too crumbly, you need to add a bit more water.

The Dough Is Ready |
At this point you want to remove the dough from the hopper and gently kneed it together. Don't over work the dough as it will make the dough tough. Separate the dough into two equal balls, wrap them in plastic wrap so they are air tight, and place into the refrigerator to rest for about an hour. This will allow the glutton in the dough to relax so the dough is not tough. After the dough has allowed to rest, you are ready to roll it out for the pie crust. I use a special mat for rolling out the dough, but you can use parchment paper or even wax paper. Dust a layer of flour onto the mat and place your dough in the centre. Carefully press the dough flat and dust the surface of the dough with a fine layer of flour. Using a rolling pin, roll the dough out from the inner to outer edges until you have reached the desired thickness. If the dough splits, carefully pinched it back together. If you find that the splits don't want to stick together, you can sprinkle a small amount of water at the split to help make it a bit more sticky.
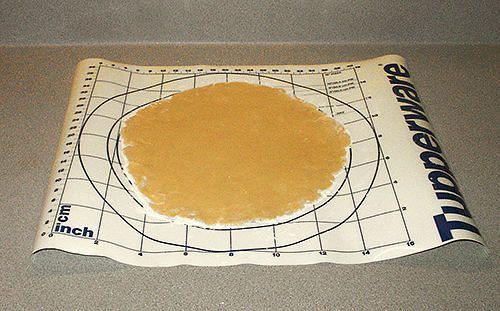
The Rolled Crust |
Once you have rolled out the crust, it is time to transfer it to the pie dish. You can roll the dough up on the rolling pin, but I find it just as easy to invert the pie dish on top of the rolled crust and flip the whole thing, including the mat, upside down; a little bit of flour on my worktop is no big deal. Carefully press the pie crust to the centre of the pan, lifting the crust away from the edge of the pie dish. Once the crust in in the centre of the dish, carefully work it down into the bottom edge. Then press the crust against the sides and then trim the excess crust away.

Inverted Crust On Dish |

Crust Pressed Into Dish |
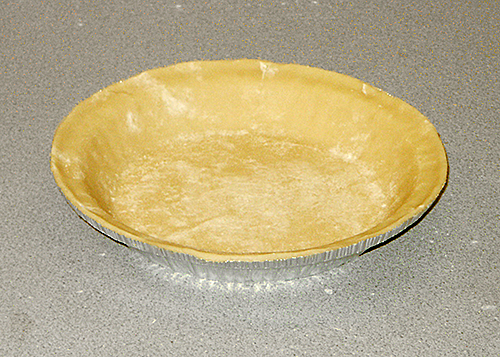
The Finished Trimmed Crust |
If you find there is a little too much flour left in the bottom of the pie crust, use a bit of the dough that was trimmed away to pick up the flour by lightly pressing the crust. As you can see, making a pie crust is very easy. The main point to remember to have a flaky pie crust is to not over work the dough. You can make these crusts ahead of time and freeze them just as you buy frozen pie crusts at the market.