<< Previous Page :: Next Page >>

on Wednesday, October, 03 2012 @ 04:04:17 pm (450 words)
In Breads [ 8020 views ]

Yes, I am at it again. This time I made tomato sauce from the Roma tomatoes I grew in the back garden. The garden did not produce as much this year. It turned out to be a short growing season with all the cold weather we had in the Spring and the extended dry and hot weather this summer. However, just because the produce yield was low does not mean it will go to waste.

Chopped Romas ready for the processor

In the photo above you can see a pot of chopped Romas ready for the processor. I really love my Prestige processor. It comes with three stainless steel pots and several different attachments for doing all sorts of food processing. To prepare the Romas wash them and cut off the stem end and chop into several pieces. Choose firm ripe tomatoes that are free from blemishes; of course they don't have to be perfect. When my pot started overflowing, I thought it was a good time to stop and take a photograph.

Puréed Romas ready for cooking.

In the photo above you can see a pot of the puréed Romas ready for cooking. The pinkish colour comes from whipping in air during the puréeing process. Don't worry about the induced air as it will boil out during cooking. Don't try and rush the reducing process; it will take several hours depending on the quantity of puréed tomatoes you start with and the amount of liquid they contain. One of the reasons that Romas are used for making tomato sauce is they are meatier and have less liquid that other types of tomatoes. Of course you can use other types of tomatoes for making tomato sauce, I just prefer Romas. If you try and rush the reducing process you will probably end up scorching the tomatoes and ruining the entire batch. I reduced the amount to about half and ended up with a viscosity that was right for me. This is the same process you will use to make tomato paste; you just keep cooking until you have a paste consistency instead of a sauce consistency.

The finished product - five pots of tomato sauce

I ended up with five and a half US pints (473 ml) of tomato sauce. The bottling process is the same I have explained in earlier blog posts. What I need to caution here is that my tomato sauce only contains tomatoes. I don't add other ingredients at this point because it allows me to use my tomato sauce in different ways. If you are making a sauce and adding such things as green peppers and onions you have to process the jars in a pressure bottler.

on Wednesday, July, 11 2012 @ 09:37:19 pm (419 words)
In Muffins [ 7024 views ]

The other day I was in a shop and came across a pot of whole berry cranberry sauce with no preservatives added. "I bet this cranberry sauce would make some great muffins", I thought to myself. I brought the cranberry sauce home with me and the muffins turned out great; therefore, I am sharing the recipe in case you would like to try baking some.


Cranberry Orange Walnut Muffins


  • 500 mL (2 cups)all purpose flour
  • 120 mL (1/2 cup) white sugar
  • 15 mL (1 Tbsp) baking powder
  • Orange zest (One large or two small)
  • 150 mL (2/3 cup) orange juice (Fresh from the oranges)
  • 2 eggs (lightly beaten)
  • 80 mL (1/3 cup) butter (melted)
  • 120 mL (1/2 cup) walnuts (chopped)
  • 1 - 468 g (16 oz) pot of whole berry cranberry sauce

Set the oven to 175°C/350°F/Gas Mark 4


Combine the flour, sugar, and baking powder. I use the mixer to make sure I have the flour, sugar, and baking powder well shifted together. To the dry ingredients add the walnuts and orange zest and again let the mixer combine them. With the mixer on a low speed, add the eggs, melted butter, and orange juice and let mix just long enough to come together. Finally add the cranberry sauce just mixing long enough to bring the mixture together uniformly. When making a quick bread, remember to only mix the ingredients long enough to bring everything together; over mixing will result in a tough bread. If need be, stop the mixer and scrap down the sides of the bowl and check the bottom of the bowl to make sure no dry ingredients remain.

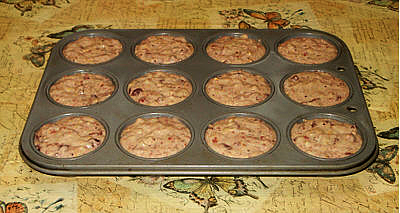
Spray an unlined muffin tin (yes, unlined; we are not making fairy cakes) with non-stick cooking oil. Fill each section level and place on a centre rack in the oven. Baking time will be from 30 to 45 minutes. When near the time, peek into the oven and check for brownness on the crowns removing once the crowns are to your liking. Place the muffin tin on a cooling rack so air can circulate freely. When the muffins are ready to remove from the tin, dump them out onto their crowns on a tea towel so the bottoms don't become soggy.

Filling The Tin
Filling The Muffin Tin
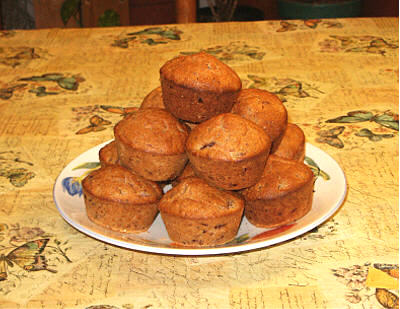
A Delicious Stack Of Fresh Baked Muffins
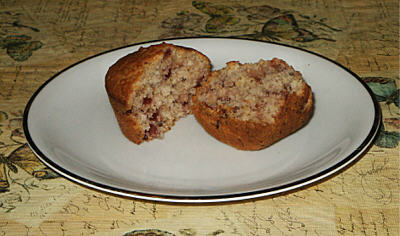
Looks Good Enough To Eat!

There you have it, homemade muffins. As Alton Brown would say, "Good eats". They were indeed good eats; I found the cranberry and orange offset each other nicely. Now put on the kettle and enjoy a nice hot cup of tea and one of your muffins, or even two.


on Monday, April, 09 2012 @ 09:16:11 pm (474 words)
In Cakes [ 5000 views ]

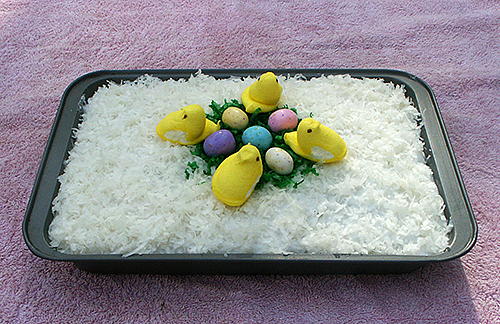
An Easter tradition for me is baking a coconut cake and decorating it with peeps and eggs. The tradition was started by Mum who always baked a coconut cake for Easter and would decorate it with peeps and eggs and of course I would help her. I added the "green grass" to the decorations one year and that became a part of the decorations each year as it added to the theme.


Easter Cake

Ingredients

  • A sheet cake of your choice
  • Flake Coconut
  • Icing Sugar
  • Coconut Flavouring
  • Coconut Oil
  • Water
  • Food Colouring
  • Marshmallow Peeps
  • Jelly or Malted Eggs

Prepare a sheet cake of your choice; usually I go with a white cake but this year I decided on a richer butter cake. You can add coconut flavouring to the cake batter. Once the cake has baked and cooled, it is time to make the icing. The amount of icing you will need will vary on the size of the sheet cake. For a standard size sheet cake, you will most likely end up using at least three fourths of a 907g (2lb) bag of icing sugar; it is better to make more than you think you will need as I almost did not have enough to ice my cake. Mix the icing sugar, a small spoon of coconut flavouring, water (best to add a little at a time), and about two to three spoonfuls of coconut oil; to keep the icing soft, together. When you have the icing to a consistency that is not too thin but not too stiff; it will flatten out in the bowl, add flake coconut to the mixture. That is all there is to making the coconut icing. Spread the icing on the cake by putting dabs of the icing around the top and then carefully flatting them out. If you try to spread this icing, it will tear the surface of the cake. Once you have the icing in place, sprinkle flake coconut on top. I accidentally picked up angel flake coconut. While it worked well in the icing, it was a pain to sprinkle the angel flake coconut on top of the cake

To finish the cake you want to add the peeps and eggs. To make the "green grass" place some flake coconut in a plastic bag and add two to three drops of green food colouring. Close the plastic bag and give it a generous shake to spread the green food colouring around the coconut. Again, I found the angel flake coconut harder to work with. Spread the "green grass" in the centre of the cake and add your jelly or malted eggs. Separate the yellow peeps and place them around the edge of the "nest". That is all there is to creating a very pretty Easter cake to share with your family and friends.


<< Previous Page :: Next Page >>