<< Previous Page :: Next Page >>

on Monday, December, 13 2010 @ 10:49:30 am (310 words)
In Uncategorized [ 4483 views ]

During the holidays I like to prepare a simple chocolate candy, both dark chocolate and white chocolate. Making the candy is very easy and quick, and it is a treat that doesn't stay around for long. There are just two ingredients in the candy, chocolate and chopped nuts.


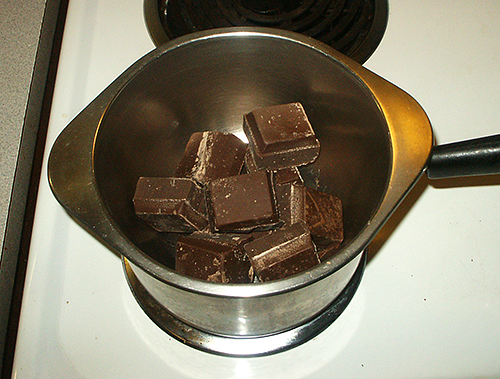
Melting the chocolate

It is best to melt the chocolate in a double boiler on top of the cooker. If you elect to use the microwave, be very careful as you can cook the chocolate instead of simply melting it. Reduce the power of the microwave and open the door often to stir the chocolate. I recommend that you do not use the microwave and use the double boiler as you will be less likely to cook the chocolate, and the double boiler will keep the chocolate melted as you make the candies.


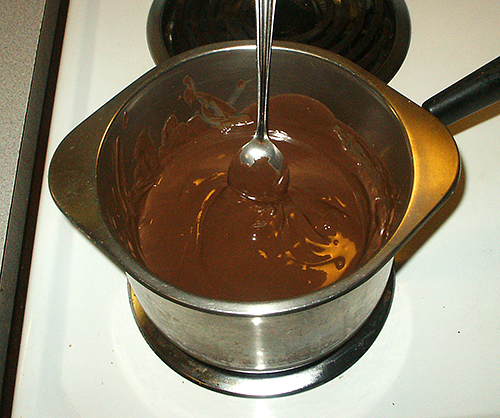
Chocolate has completely melted

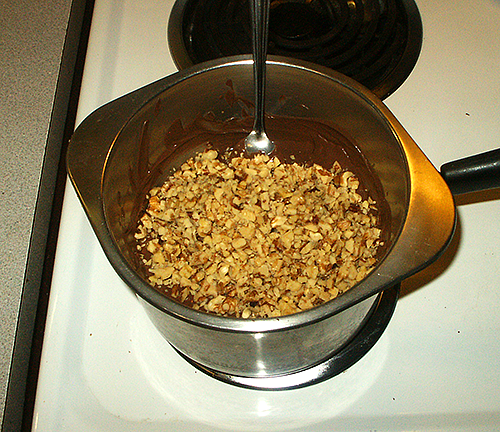
Nuts added to the melted chocolate

Once the chocolate has completely melted and there are no little lumps left, it is time to add your chopped nuts. I used chopped English walnuts for the dark chocolate, and chopped pecans for the white chocolate. Stir the nuts into the chocolate until they are completely mixed in with the chocolate.


Forming the candy

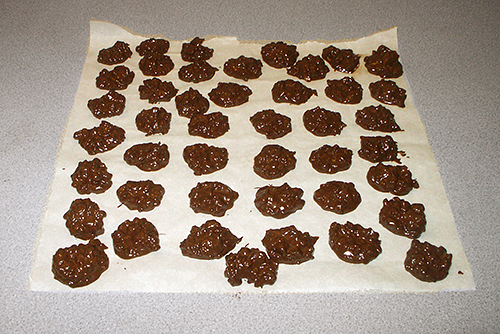
To form the candy, place a sheet of parchment paper on your worktop. Using a spoon, simply scoop up a bit of the chocolate and nuts mixture and drop onto the parchment paper. I don't worry about each being the same size; if you want perfectly formed candy, then you will need to buy some candy moulds. The white chocolate candies are made exactly the same way as the dark chocolate candies.


Dark chocolate with chopped walnuts

White chocolate with chopped pecans

These are delicious candies and they will definitely be a hit with your holiday guests. Don't be surprised if they quickly disappear.


on Friday, December, 10 2010 @ 12:13:30 pm (504 words)
In Uncategorized [ 3747 views ]

A popular favourite for the holidays is magical biscuit bars. They are magical both in the way they are made, and in the way they will disappear after you make them. These biscuits are so easy to make and they are simply scrumptious.


The Ingredients:
  • 500 ml (2 cups) Graham cracker crumbs
  • 180 ml (3/4 cup) melted butter
  • 1 tin 396 g (14 oz) sweetened condensed milk
  • semisweet chocolate chips
  • flaked coconut
  • chopped nuts (your choice)

Prepare a baking dish by lining the bottom with parchment paper. The parchment paper will make the removal of the biscuit bars easier. Add about three fourths of the butter to the Graham cracker crumbs and stir together. You can use either boxed cracker crumbs or make your own crumbs from whole crackers. Add additional butter to the Graham cracker crumbs until they are moistened and will hold together when pressed with the spoon. Spread the Graham cracker and butter mixture evenly along the bottom of the baking disk and press firmly to the pan. To make pressing the Graham crackers easier, use a bit of parchment paper and press on the parchment paper instead of directly on the Graham cracker crumbs; the Graham cracker butter mix will not stick to the parchment paper as it will to your fingers or a spoon.


Graham Cracker Crumbs

The next step is to pour the sweetened condensed milk evenly over the Graham cracker crumbs. It is important to slowly pour the sweetened condensed milk back and forth and side to side over the crumbs and let it spread itself over the crumbs. If you try to spread the sweetened condense milk with a spoon you will pull the Graham crackers up from the bottom of the pan.


Sweetened Condensed Milk

Next step is to add a layer of the chocolate chips on top of the sweetened condensed milk.


Semisweet Chocolate Chips

Next step is to add a layer of the flake coconut on top of the chocolate chips.


Flaked Coconut

The next step is to add a layer of chopped nuts. I decided to add both walnuts and pecans to my magical biscuit bars. It is your choice as to what type of nuts to add.


Chopped Nuts (Walnuts and Pecans)

You continue to repeat this layering of chocolate chips, flaked coconut, and chopped nuts until you have your dish full. I ended up doing three layers for my magical biscuit bars.


Ready For The Oven

When you have your layering finished, gently pat the layers together and place the baking dish into a moderate oven set to 180°C, 350°F, gas mark 4, and allow to bake for approximately 25 minutes or until the top is a golden brown. Allow the pan to completely cool before attempting to cut the biscuit bars.


Finished Product, Allow To Cool Before Cutting

Magical Biscuit Bars

These biscuit bars will be a big hit with your holiday guests. I guarantee they will magically disappear in no time at all. You may have to bake a second batch just to have some for yourself.


on Tuesday, November, 23 2010 @ 10:45:31 pm (201 words)
In Uncategorized [ 6878 views ]

If you want a really moist and favourable baked turkey, especially the breast meat which is hard to cook without drying it out, then the way to go is to brine your turkey. To make the brine solution, add 250 ml (1 cup) of salt and 125 ml (1/2 cup) sugar to a pot of water and bring to a boil. If you desire, you can add your favourite herbs to the pots and allow the hot water to draw the oils from the herbs. Once the salt and sugar has dissolved, add ice cold water to the mixture, and pour into a container large enough to hold your turkey and the required liquid. You want the turkey completely submerged in the brine solution; if need be, add more ice cold water to completely submerge the turkey. Place the turkey with the breast side down in the brine solution and placed back in the refrigerator, or in a cold garage or shed if you live in a cold climate. Allow the turkey to sit overnight in the brine solution. Brining a turkey will not make it salty, but it will make it a moist and tender turkey that will have you receiving plenty of complements.


<< Previous Page :: Next Page >>