I decided to use some of my Roma tomatoes I grew in the back veggie garden to make some salsa. Salsa is an ancient food that pre-dates the conquest of Mexico by the Spaniards. Combining chilies, tomatoes, and other spices to create a sauce can be traced back to the Aztecs, Mayans and Incas. Salsa is simply the Spanish word for sauce. Salsa can take on many different forms limited only by the imagination of the cook. The salsa I made was a simple combination of tomatoes, onions, a variety of peppers, and a variety of spices and seasoning.
I prefer to use Roma tomatoes for my salsa because Romas are meatier and contain less liquid; however, one can use any variety of tomatoes. I do not peel the tomatoes before I purée them. There really is no need to go to the trouble of removing the peel, when you purée the tomatoes the peel will disappear into the purée and you will never know they are in there. Plus, the peelings of tomatoes contain a lot of the lycopene. I remove the stem end of the tomatoes and cut them in half. I also remove and discard the jelly seed mass of the tomatoes. Once I had the tomatoes sliced, and the seeds removed, I used my Prestigetm food processor to purée the tomatoes.
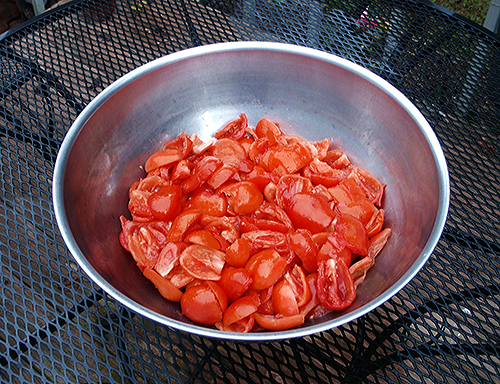 |
| Roma Tomato Pieces |
 |
| Puréed Roma Tomatoes |
When you use the food processor to purée the tomatoes, it will whip air into the mixture. Do not worry about the air, it will boil out when you cook your tomatoes. I grew a variety of hot and mild peppers in my garden and used some of each in making my salsa. If you have never grown your own peppers, I recommend adding some to your veggie garden next year. There is nothing like walking out to the back veggie garden and picking your own fresh peppers. To prepare the peppers, I use a food processor that will allow me to chop the peppers as coarse or fine as I desire. For this particular salsa, I decided to make a less chunky salsa and use the food processor to dice the peppers. Dicing with the food processor is way faster than doing it by hand, and when making larger batches of salsa it is the only way to go. When processing the hot peppers, I recommend wearing latex or vinyl gloves to prevent the capsaicin oil from penetrating the skin. It does not take much of the oils to cause your fingers and hands to burn for a considerable length of time. After dicing the peppers I diced two large yellow onions; yellow onions are more pungent than white and sweet onions and can over power the peppers if you use to many.
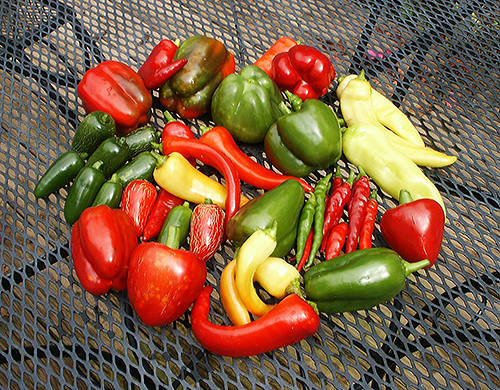 |
| The Peppers (from my veggie garden) |
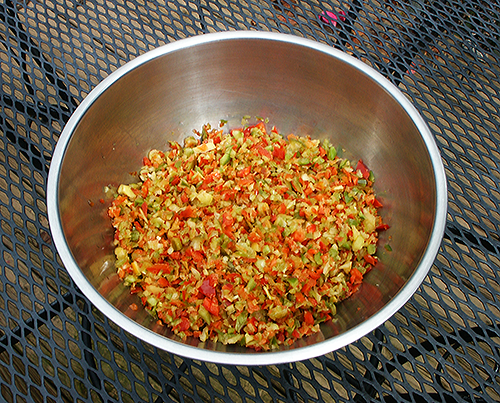 |
| Diced Peppers |
I combined the tomato purée, the diced peppers, the diced onions, and added a bit of garlic, black pepper, a bit of salt, some paprika, and a bit of sugar to help cut the acidity; there is no recipe, you season to your particular tastes. Bring the mixture to a low boil, remembering to stir it often so it does not scorch; if you allow it it scorch you will have to toss the whole batch out and start over. If you find your salsa is a bit on the thin side, and you don't want to spend the time reducing the tomato puree, you can add a bit of corn starch to the mixture. Make a slurry of the corn starch before adding to the salsa and remember that you have to bring the mixture a full boil in order for the thickening agent to do its job. To test for the consistency, place a small amount of the salsa in a bowl and allow it to cool. Once it has cool, you can then get an idea of how thick the finished salsa will be. If the test is still too thin, then add more corn starch; in a slurry, to the salsa and allow it to come to a boil. I ended up with a salsa that had a nice consistency for dipping with tortilla chips, or to use as a condiment on other foods.
 |
| The Finished Product |
Since salsa contains low acidic ingredients, you will have to process it in a pressure bottler for storage. Some recipes will call for adding vinegar or lemon or lime juice to help increase the acidity for storage using a water bath processing procedure. However, I don't like adding these ingredients to my salsa and using a pressure bottler is simple, and you will not turn your kitchen into a sauna. Since we are going to use a pressure bottler to process our salsa, we under cook the salsa before bottling. My pressure bottler is the one that Mum used for bottling, and it has been around for as long as I can remember. Mum and I replaced the seals and the over pressure plug; it is very important that the over pressure plug is soft and pliable as that it is the safety valve that will prevent the bottler from exploding. Mum told me a story once about the day grandfather blew up a bottler spewing green beans all over grandmother's kitchen. Luckily grandfather was not in the kitchen at the time. Grandfather had left the kitchen and got distracted and only remember he was bottling green beans when the explosion happened. However, the bottler would not have exploded if the safety valve had been in proper order; it had harden and could not blow out. I remember this story every time I use the pressure bottler, and I never leave it unattended.
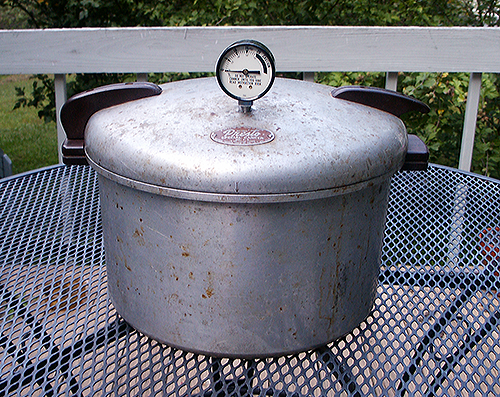 |
| Mum's Pressure Bottler |
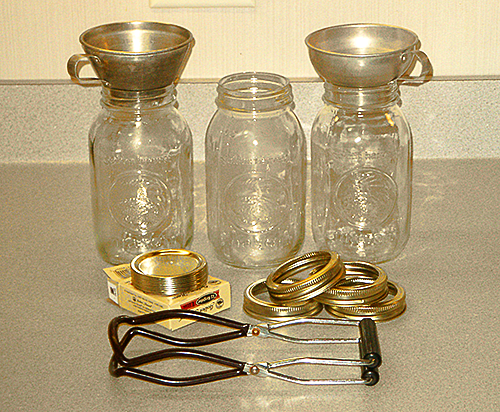
The jars used in pressure bottling are Kilner jars, also known as Mason jars in the US. These jars use a two piece top consisting of a metal lid with built in rubber seal and a metal screw band to hold the lid in place during the pressure bottling. Along with the jars you will need a metal funnel and a jar lifter for removing the hot jars from the bottler. You will need to sterilise the jars and lids using boiling water before you fill the jars. Before sterilising the jars, wash them in hot water using a liberal amount of washing up liquid.
 |
| Equipment Needed in Home Bottling |
In order to ensure safe storage of our salsa, we need to process the jars for the proper amount of time so we kill any bacteria that may be present. For salsa, the recommended time is 10 minutes at 69 kpa, or 10 psi. If you remember from your thermodynamics, the relationship between pressure, temperature, and volume is a three dimensional plot. However, we are going to be holding the volume constant since we have a closed system (our pressure bottler); therefore, our relationship will concern pressure and temperature. In our closed system, at 69 kpa pressure water will boil at 113ºC (235ºF).
Before filling the jars, place about 2.5 to 5 cm of water in the bottom of your pressure bottler and allow the water to come to a simmer. This will prevent the hot jars from cracking as you place them in the pressure bottler. Fill each jar while the jar is hot, leaving about 1.3 cm headspace at the top of the jar. To make it easy, I simply fill each jar to the bottom of the screw threads at the top of the jar. Place a sterilised lid in place and screw the band very snugly to ensure that the salsa will not bubble out during processing. Check to make sure the wire rack is in the bottler; we don't want the jars to come in contact with the bottom of the pressure bottler. Place each jar in the bottler after you tighten the lid in place and repeat until all the jars are filled.
Place the lid in place and make sure it is in the lock position; follow the instructions for your particular pressure bottler. Turn the burner on high and allow the water in the pressure bottler to come to a full steam. Let the pressure bottler vent for about 10 minutes to make sure the bottler is full of steam. I watch for a steady constant full vent of steam for several minutes but I caution my readers to follow the instructions that come with their particular bottler. When you are venting a steady steam for the recommended amount of time, using an oven mitt quickly close the vent, or place the vent cap into position.
 |
| Lid in Place, Pressure Up |
 |
| Pressure At 69 kpa, 10 psi |
When the pressure bottler has reached the desired pressure; in our case of bottling salsa it is 69 kpa, 10 psi, or a bit above, slowly start backing off on the burner regulator. Electric cookers are better than gas cookers as they have a thermostat for the burners. As you slowly back off you will be able to bring the pressure bottler to the required pressure and keep it steady at that pressure. We need to hold the pressure at 69 kpa, 10 psi for 10 minutes. When the 10 minutes has been reached, turn off the burner to the pressure bottler and let the pressure fall to zero. Under no circumstances should you attempt to open the pressure bottler until the pressure has reached zero. Once the pressure has reached zero, carefully open the bottler allowing the steam to vent away from your face. Remove the jars from the pressure bottler using the jar lifter and place the hot jars on a tea towel away from any drafts to prevent cracking of the jars. The jars are not sealed at this point. As the jars cool, the lids will pop down with a "pop" sealing the jars. Do not disturb the jars until they have completely cooled. I usually wait until the next day to remove the bands.
 |
| The Final Pots of Salsa |
I really enjoy doing my own bottling. My salsa has no artificial preservatives at all and will easily keep for two to three years, although it will be consumed long before that time.