While apples can be preserved by freezing them, the high water content will limit how you can use the apples afterwards. As the juice in the apples freezes, it breaks down the structure and causes the apples to become very soft; basically limiting you to making applesauce type dishes. If you wish to preserve apples and have them to keep some of their firmness, then pressure bottling is the way to go. Apples have a high acid content so the time needed to properly preserve them is very short, only requiring eight minutes at six pounds of pressure.
 Equipment Used in Pressure Bottling |
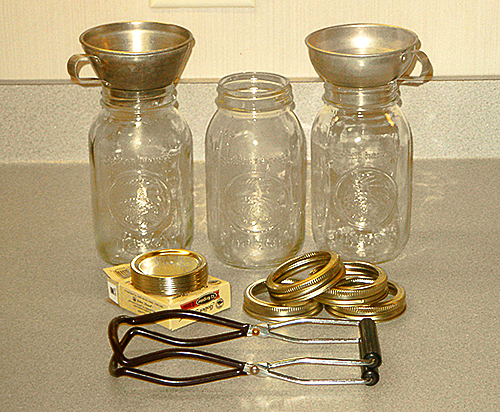
In the photograph above you can see some of the equipment needed in home bottling. The jars used are glass Kilner jars; also known as Mason jars in the US, and have a two piece top with a lid and a screw band. You can see the lids and bands in front of the jars. To fill the jars you will need a metal funnel designed to fit the mouth of the jar. If you are using wide mouth jars you can use a narrow funnel, but it will be easier to have a wide mouth funnel as well. Almost all of my bottling is done with the regular mouth jars, but if you plan on bottling whole fruits, such as tomatoes, the wide mouth jars are better as they allow the fruit to fit through the mouth of the jar easier. The utensil in front is a jar lifter. It is used to remove the hot jars from the pressure bottler after you allow the pressure to drop to zero. My pressure bottler is a 15 litre bottler. If you recall from your thermodynamics, at 6 psi with a constant volume the temperature will reach 110 °C (230 °F). Water at 1 atmosphere will boil at 100 °C so the temperature will increase 10 degrees over the normal boiling temperature of water.
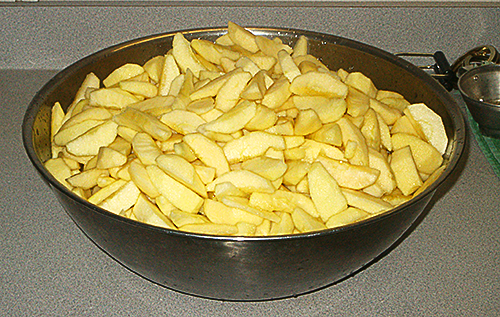 Peeled, Cored, and Sliced Apples |
The first step is to wash your apples. Even though you are going to be peeling your apples, you want to make sure the apples are clean; you don't want to transfer contaminates from the surface of the apples when you are peeling them. Do not worry about any stems that may still be attached to the apples; we will take care of the stems when we core the apples. It is important to remove the peels as apple peelings toughen during cooking. I prefer to use a vegetable peeler to remove the peels; I can quickly remove an entire peeling in about fifteen seconds or less. However, peeling, coring and slicing a half bushel of apples will take a bit of time. If you do not own a corer I suggest you buy one as they will make the job of slicing so much easier. Remove the cores by twisting the corer as you push down; I use a plastic cutting board under the apples. Once the core is removed, slice the apple in two sections and then slice the sections into the desired thickness you prefer. To keep the apples from browning place them in a water bath that contains ascorbic acid; you can either use powdered ascorbic acid available from health food shops, or a commercial product usually labelled as fruit fresh. If you are using powder ascorbic acid, use about three to four grams per four litres of water. If using the commercial product, follow the instructions that come with the product.
 Pressure Bottler Loaded with Jars |
The next step is to make a syrup that will be poured over the apples once they are placed in the jars. I apologise for not having photographs of the actual filling of the jars; however, I did not have anyone here to help me and I needed to quickly fill the jars and place them in the bottler. You can make a light, medium, or heavy syrup. Golden Delicious apples are fairly sweet, so I made a light syrup using a ratio of 2 parts water to 1 part white sugar. You need to bring the syrup to a boil and you will use the syrup to blanch the apples for about five minutes before filling the jars. You will need to sterilise the jars in boiling water first; after washing them in hot water with a liberal amount of washing up liquid, before filling. The lids are also sterilised in boiling water before placing on the jars. It is important to have everything that comes in contact with the apples sterilised.
Before filling the jars, place about 2.5 to 5 cm of water in the bottom of your pressure bottler and allow the water to come to a simmer. This will prevent the hot jars from cracking as you place them in the pressure bottler. As you place the apples in the jars, shake the jars to settle the apples. You can also use a sterilised spoon to help settle the apple slices, but avoid crushing the apples. When the jar is full, leaving a head space of about 1.3 cm (I fill the jars to the bottom of the jar threads where the band will end as a rough guide and I have never had any problems), add the syrup making sure no air bubbles are trapped between the apple slices. Carefully give the jar a bit of a shake to help the air bubbles to rise to the top. Place a sterilised lid in place, and screw the band down snugly. It is important to have the lid on snugly. I lost almost all the syrup in one jar during processing as the lid was not on securely enough; the syrup boiled out of the jar. Place the filled jar in the pressure bottler and repeat for the next jar. My bottler is a 15 litre and will hold seven US quarts.
 Lid in Place, Pressure Up |
Once the pressure bottler is full, place the lid in place and make sure it is in the lock position; follow the instructions for your particular pressure bottler. Turn the burner on high and allow the water in the pressure bottler to come to a full steam. Let the pressure bottler vent for about 10 minutes to make sure the bottler is full of steam. I watch for a steady constant full vent of steam for several minutes but I caution my readers to follow the instructions that come with their particular bottler. I normally observe a pressure rise of about 1 or 2 psi, which means the steam is above 100 °C plus it is under pressure. When you are venting a steady steam for the recommended amount of time, using an oven mitt quickly close the vent, or place the vent cap into position.
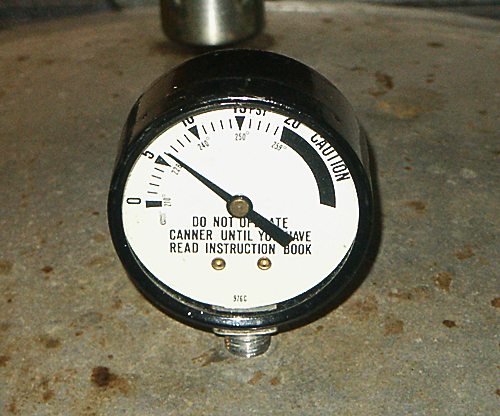 Six PSI on the Pressure Gauge |
When the pressure bottler has reached the desired pressure; in our case of bottling apples it is 6 psi, or a bit above, slowly start backing off on the burner regulator. Electric cookers are better than gas cookers as they have a thermostat for the burners. As you slowly back off you will be able to bring the pressure bottler to the required pressure and keep it steady at that pressure. We need to hold the pressure at 6 psi for 8 minutes. When the eight minutes have been reached, turn off the burner to the pressure bottler and let the pressure fall to zero. Under no circumstances should you attempt to open the pressure bottler until the pressure has reached zero. Once the pressure has reached zero, carefully open the bottler lid rear first so the steam will vent away from your face. Remove the jars from the pressure bottler using the jar lifter and place the hot jars on a tea towel away from any drafts. The jars are not sealed at this point. As the jars cool, the lids will pop down with a "pop" sealing the jars. Do not disturb the jars until they have completely cooled. I usually wait until the next day to remove the bands.
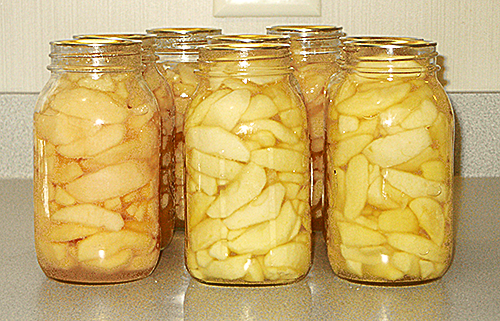 The Finished Product |
I ended up with nine US quarts of apples, but one of the quarts lost too much of the syrup because I did not screw the band down as tight as was needed. As you can see in my photographs, I have an old pressure bottler. However, I keep the bottler maintained and just before Mum died, we replaced all the seals, the overpressure plug, and the pressure gauge. Using a pressure bottler is safe as long as you properly maintain the bottler and make sure the overpressure plug or vent is in proper condition and follow the instructions for using your pressure bottler. The outer surface of my bottler could use a bit of cleaning; I was a bit ashamed to show it. I have no idea how old the pressure bottler is, but Mum was using it when I was just a little girl.
Feedback awaiting moderation
This post has 466 feedbacks awaiting moderation...