<< Previous Page :: Next Page >>

on Thursday, November, 18 2010 @ 05:53:21 pm (725 words)
In Uncategorized [ 22600 views ]

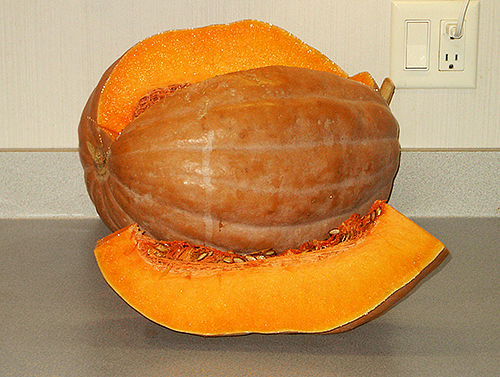
If you have only had pumpkin pies made from tinned pumpkin, you have not had a real pumpkin pie. Preparing a whole pumpkin is a very easy process and should not deter one from preparing their own fresh pumpkin. I purchased a pie pumpkin from a produce market and got a 15 kg (33 lb) pumpkin for only $4.99 plus sales tax. Now a 15 kg pumpkin is going to produce a lot of pumpkin. If you are only wanting to make a few pies for the holiday, you will want to purchase a much smaller pumpkin. I will measure out and freeze the bulk of my pumpkin to use in pies and bread and soups in the coming year. It is important to purchase a pie pumpkin and not one of the decorative pumpkins often used for making jack-o'-lanterns.


My 15kg pie pumpkin

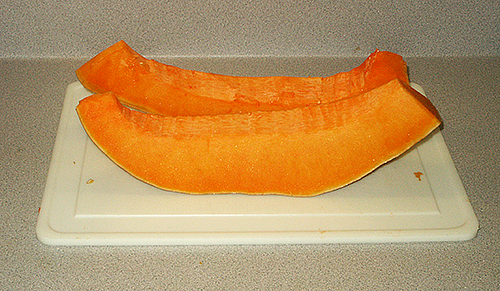
I prepare the pumpkin by cutting wedges that are easier to handle. Once the wedge is cut, I use a thin blade knife to remove the seed layer. The seeds are attached to the inside hollow of the pumpkin by a fibrous mass and I find it easiest to just slice this layer away. If you like, you can save the seeds and toast them for a delicious snack. To toast the seeds, first wash them and allowed to air dry. Coat the seeds with a thin layer of oil and spread the seeds onto a baking sheet and sprinkle with your favourite seasonings. Place the baking sheet into a moderate oven (160°C, 325°F) for about 25 to 30 minutes checking for proper toasting.


First Wedge

Seed Layer Removed

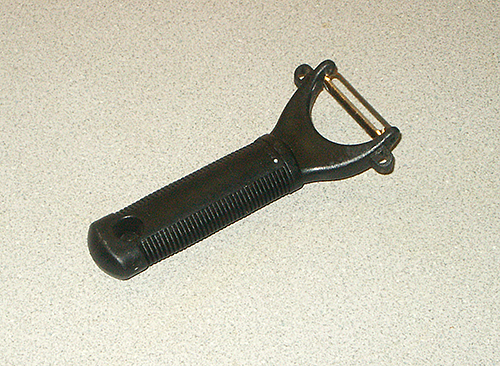
At this point, I need to note that some will place the pumpkin in the oven with the peel still attached. It is true that you can leave the peel on and scoop the pumpkin out. However, the peel will cook soft, and you will find yourself picking out bits of peel. I prefer to take the extra time and remove the peel before cooking. Furthermore, in my opinion cooking the peel with the pumpkin adds an undesirable taste as well. To remove the peel, it is best to use a vegetable peeler as the peel is tough and using a knife can lead to injuries. A vegetable peeler makes the job quick and easy. To remove the peel, hold one end of the wedge and peel half of the wedge. Once half of the peel is removed, rotate the wedge and finished the other end. This is much better than trying to hold the wedge and remove the peel the entire length of the wedge.


Vegetable Peeler

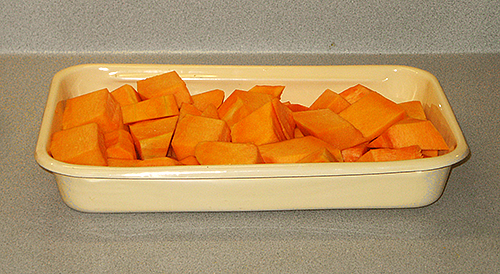
Once you have the peel removed, you simply slice the wedge and place the slices in a baking dish. Arrange the slices along the bottom of the pan and place another layer on top. Place as many layers as your baking dish will hold. I ended up with four large baking dishes filled with pumpkin, as much as my oven would allow at one time with some pumpkin left over.


Pumpkin Slices In Baking Dish

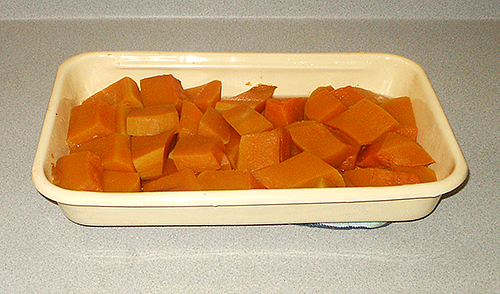
Cover the baking dish and place into a moderate oven (160°C, 325°F)for about 30 to 45 minutes (time will depend on how much pumpkin you are cooking at one time); if the slices are not fork tender, then allow to continue cooking until the slices are tender and falling apart. Pumpkin contains a lot of liquid and this liquid will come out during baking. When the pumpkin is ready, remove the slices and discard the liquid. You may see more liquid drain out and you want to remove this liquid as well. To help drain the liquid, you can set a colander inside of a bowl and place the cooked pumpkin into the colander. It is important to remove as much of the liquid from the cooked pumpkin as possible.


Baked Pumpkin Ready To Use

If you have only used tinned pumpkin, you are going to be in for a treat. You now have real pumpkin to use. You can use fresh pumpkin in place of tinned pumpkin in any recipe calling for tinned pumpkin. If you have extra pumpkin than you need for your pies, you can freeze the pumpkin in zip freezer bags and use it later. Pumpkin nut bread made with fresh pumpkin is simply marvellous and is a great addition to a tea.


on Saturday, November, 13 2010 @ 01:52:12 pm (850 words)
In Uncategorized [ 25044 views ]

I was very disappoint with my beets this year. I actually sowed the seeds twice, and both times after planting heavy rains washed the seeds away. I have decided to plant the seeds in flats next year and do transplants instead of sowing directly into the ground. After the heavy rains, the weather turned to one with very hot and humid days. However, even with the short season I did manage to get enough beets to make a few pots of beet pickles.

Pickling beets is easy, although it can be a bit messy. To help keep the mess down, I spread several layers of newspapers or circulars on my work tops before starting. Since we are talking about a root crop, it is very important to wash the beets as thoroughly as possible using several changes of water. You want to make sure all of the soil and grit is removed before cooking. When washing the beets, avoid breaking the roots off as much as possible. Once the beets are clean, you want to cut the tops off leaving about 5 cm (2 in) of the tops in place. Do not cut the tops off at the beet or remove the roots as it will cause the beets to bleed out during cooking. I remember Mum telling me about her first beet pickling experience. She removed the tops and the roots before cooking and the beets bleed out resulting in beet pickles that had little colour or taste. Mum ruined her entire beet crop. I learned from Mum and you can learn from me.


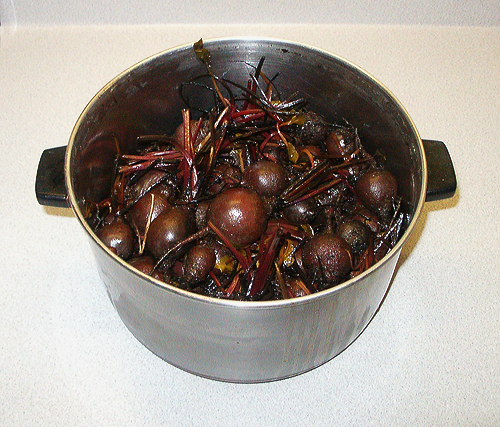
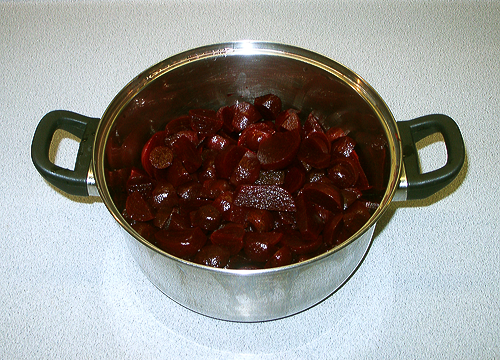
Cooked beets waiting to be peeled

Place the beets in a large pot and fill with water until the beets are covered. It is important not to over cook the beets. For one thing, the longer you cook the beets, the more they will bleed; another is that you want the beets to retain an amount of firmness; mushy beet pickles is not a good thing. The problem with telling you how long a time to cook is that it depends on the size of the beets. If you have mostly small beets, you would not cook them as long as if you had mostly large beets. An estimate would be around twenty minutes for medium to large beets. You can take out one of the smaller beets and test it to get an idea of the readiness of the beets.


Sliced beets waiting to be pickled

Once the beets are cooked, drain and allow to cool. You may want to wear some protective gloves when peeling the beets to avoid staining your hands. Peeling the beets is an easy job. First slice off the tops and the roots. To peel the beets, use the edge of your knife in a scrapping motion; you will find the peelings will slip easily from the beet. Once the beet is peeled, go ahead and slice it before peeling the next one. I slice my beets into wedges, but you can slice them to suit your fancy. I prefer the wedges and that was the way Mum always sliced her beets for pickling.

To pickle the beets I use apple cider vinegar, but you can use white vinegar as well. Mum always used apple cider vinegar for making pickles and I prefer it as well. I mix apple cider vinegar and white sugar in a 1:1 ratio. If you would like a less sweet beet pickle, reduce the amount of sugar. You may see other recipes that call for adding water. Never add water to commercial vinegars. Commercial vinegars have been reduced to 5% acidity before bottling and adding water will reduce this acidity. Adding water will result in an inferior product as well as increases the chance of spoilage. I repeat, never add water to commercial vinegars when pickling.


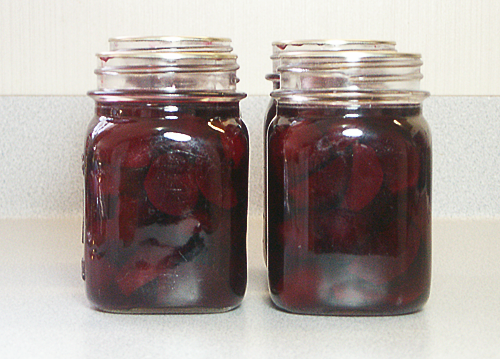
Four pots of home-made beet pickles

In a sauce pan mix the vinegar and sugar. allowing the sugar to dissolve, and bring to a boil. While the vinegar is coming to a boil, sterilise a jar and fill with your sliced beets; don't fill completely as you need to leave some room from the rim of the jar. When the vinegar and sugar mixture has come to a boil, fill the jar with vinegar. Tap the sides of the jar to release any trapped air bubbles adding more of the vinegar-sugar mixture if needed. You want to leave a head space of about 1 cm (0.5 in) Don't keep the vinegar-sugar mixture on your burner as the vinegar will boil out increasing the amount of sugar in the mixture; set the vinegar-sugar mixture aside until needed for the next jar. Place a sterilised lid on the jar and screw the band on snugly. Set the jar aside on a tea towel and continue to the next jar repeating the procedure outlined above. As the jars cool, they will seal with a 'pop'. Let the jars sit overnight before removing the bands.

I managed to get four US pints out of my meagre beet crop this year. Hopefully next year's growing season will be better.


on Wednesday, November, 03 2010 @ 07:30:35 pm (1486 words)
In Uncategorized [ 32391 views ]

While apples can be preserved by freezing them, the high water content will limit how you can use the apples afterwards. As the juice in the apples freezes, it breaks down the structure and causes the apples to become very soft; basically limiting you to making applesauce type dishes. If you wish to preserve apples and have them to keep some of their firmness, then pressure bottling is the way to go. Apples have a high acid content so the time needed to properly preserve them is very short, only requiring eight minutes at six pounds of pressure.
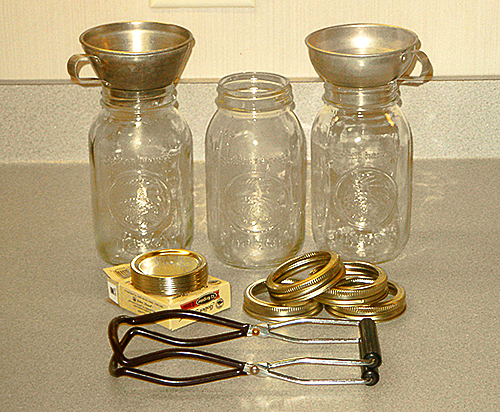

Equipment Used in Pressure Bottling

In the photograph above you can see some of the equipment needed in home bottling. The jars used are glass Kilner jars; also known as Mason jars in the US, and have a two piece top with a lid and a screw band. You can see the lids and bands in front of the jars. To fill the jars you will need a metal funnel designed to fit the mouth of the jar. If you are using wide mouth jars you can use a narrow funnel, but it will be easier to have a wide mouth funnel as well. Almost all of my bottling is done with the regular mouth jars, but if you plan on bottling whole fruits, such as tomatoes, the wide mouth jars are better as they allow the fruit to fit through the mouth of the jar easier. The utensil in front is a jar lifter. It is used to remove the hot jars from the pressure bottler after you allow the pressure to drop to zero. My pressure bottler is a 15 litre bottler. If you recall from your thermodynamics, at 6 psi with a constant volume the temperature will reach 110 °C (230 °F). Water at 1 atmosphere will boil at 100 °C so the temperature will increase 10 degrees over the normal boiling temperature of water.
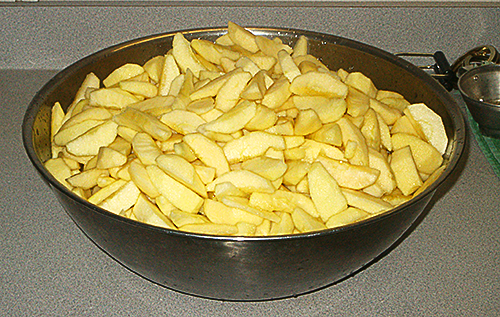

Peeled, Cored, and Sliced Apples

The first step is to wash your apples. Even though you are going to be peeling your apples, you want to make sure the apples are clean; you don't want to transfer contaminates from the surface of the apples when you are peeling them. Do not worry about any stems that may still be attached to the apples; we will take care of the stems when we core the apples. It is important to remove the peels as apple peelings toughen during cooking. I prefer to use a vegetable peeler to remove the peels; I can quickly remove an entire peeling in about fifteen seconds or less. However, peeling, coring and slicing a half bushel of apples will take a bit of time. If you do not own a corer I suggest you buy one as they will make the job of slicing so much easier. Remove the cores by twisting the corer as you push down; I use a plastic cutting board under the apples. Once the core is removed, slice the apple in two sections and then slice the sections into the desired thickness you prefer. To keep the apples from browning place them in a water bath that contains ascorbic acid; you can either use powdered ascorbic acid available from health food shops, or a commercial product usually labelled as fruit fresh. If you are using powder ascorbic acid, use about three to four grams per four litres of water. If using the commercial product, follow the instructions that come with the product.


Pressure Bottler Loaded with Jars

The next step is to make a syrup that will be poured over the apples once they are placed in the jars. I apologise for not having photographs of the actual filling of the jars; however, I did not have anyone here to help me and I needed to quickly fill the jars and place them in the bottler. You can make a light, medium, or heavy syrup. Golden Delicious apples are fairly sweet, so I made a light syrup using a ratio of 2 parts water to 1 part white sugar. You need to bring the syrup to a boil and you will use the syrup to blanch the apples for about five minutes before filling the jars. You will need to sterilise the jars in boiling water first; after washing them in hot water with a liberal amount of washing up liquid, before filling. The lids are also sterilised in boiling water before placing on the jars. It is important to have everything that comes in contact with the apples sterilised.

Before filling the jars, place about 2.5 to 5 cm of water in the bottom of your pressure bottler and allow the water to come to a simmer. This will prevent the hot jars from cracking as you place them in the pressure bottler. As you place the apples in the jars, shake the jars to settle the apples. You can also use a sterilised spoon to help settle the apple slices, but avoid crushing the apples. When the jar is full, leaving a head space of about 1.3 cm (I fill the jars to the bottom of the jar threads where the band will end as a rough guide and I have never had any problems), add the syrup making sure no air bubbles are trapped between the apple slices. Carefully give the jar a bit of a shake to help the air bubbles to rise to the top. Place a sterilised lid in place, and screw the band down snugly. It is important to have the lid on snugly. I lost almost all the syrup in one jar during processing as the lid was not on securely enough; the syrup boiled out of the jar. Place the filled jar in the pressure bottler and repeat for the next jar. My bottler is a 15 litre and will hold seven US quarts.

Lid in Place, Pressure Up

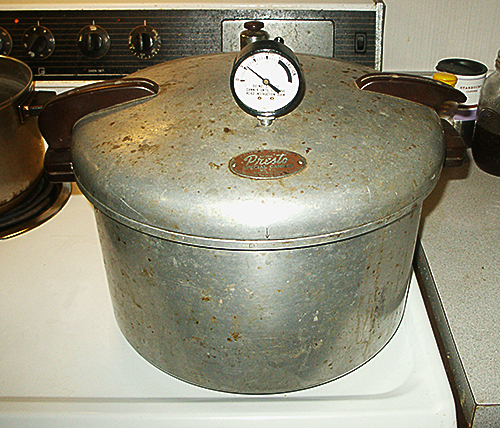
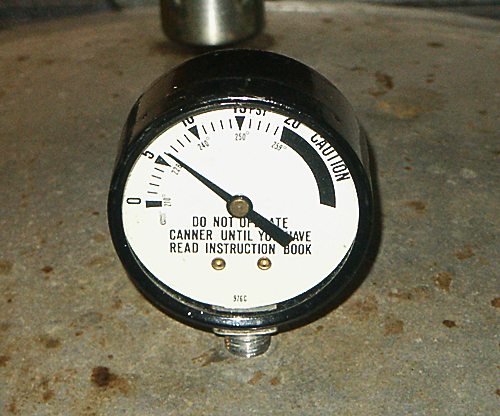
Once the pressure bottler is full, place the lid in place and make sure it is in the lock position; follow the instructions for your particular pressure bottler. Turn the burner on high and allow the water in the pressure bottler to come to a full steam. Let the pressure bottler vent for about 10 minutes to make sure the bottler is full of steam. I watch for a steady constant full vent of steam for several minutes but I caution my readers to follow the instructions that come with their particular bottler. I normally observe a pressure rise of about 1 or 2 psi, which means the steam is above 100 °C plus it is under pressure. When you are venting a steady steam for the recommended amount of time, using an oven mitt quickly close the vent, or place the vent cap into position.

Six PSI on the Pressure Gauge

When the pressure bottler has reached the desired pressure; in our case of bottling apples it is 6 psi, or a bit above, slowly start backing off on the burner regulator. Electric cookers are better than gas cookers as they have a thermostat for the burners. As you slowly back off you will be able to bring the pressure bottler to the required pressure and keep it steady at that pressure. We need to hold the pressure at 6 psi for 8 minutes. When the eight minutes have been reached, turn off the burner to the pressure bottler and let the pressure fall to zero. Under no circumstances should you attempt to open the pressure bottler until the pressure has reached zero. Once the pressure has reached zero, carefully open the bottler lid rear first so the steam will vent away from your face. Remove the jars from the pressure bottler using the jar lifter and place the hot jars on a tea towel away from any drafts. The jars are not sealed at this point. As the jars cool, the lids will pop down with a "pop" sealing the jars. Do not disturb the jars until they have completely cooled. I usually wait until the next day to remove the bands.

The Finished Product

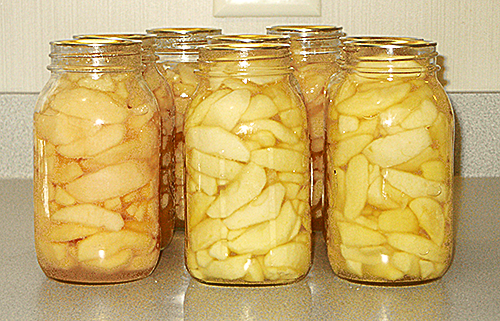
I ended up with nine US quarts of apples, but one of the quarts lost too much of the syrup because I did not screw the band down as tight as was needed. As you can see in my photographs, I have an old pressure bottler. However, I keep the bottler maintained and just before Mum died, we replaced all the seals, the overpressure plug, and the pressure gauge. Using a pressure bottler is safe as long as you properly maintain the bottler and make sure the overpressure plug or vent is in proper condition and follow the instructions for using your pressure bottler. The outer surface of my bottler could use a bit of cleaning; I was a bit ashamed to show it. I have no idea how old the pressure bottler is, but Mum was using it when I was just a little girl.
<< Previous Page :: Next Page >>